How to Replace Shutter Magnets Without Damage
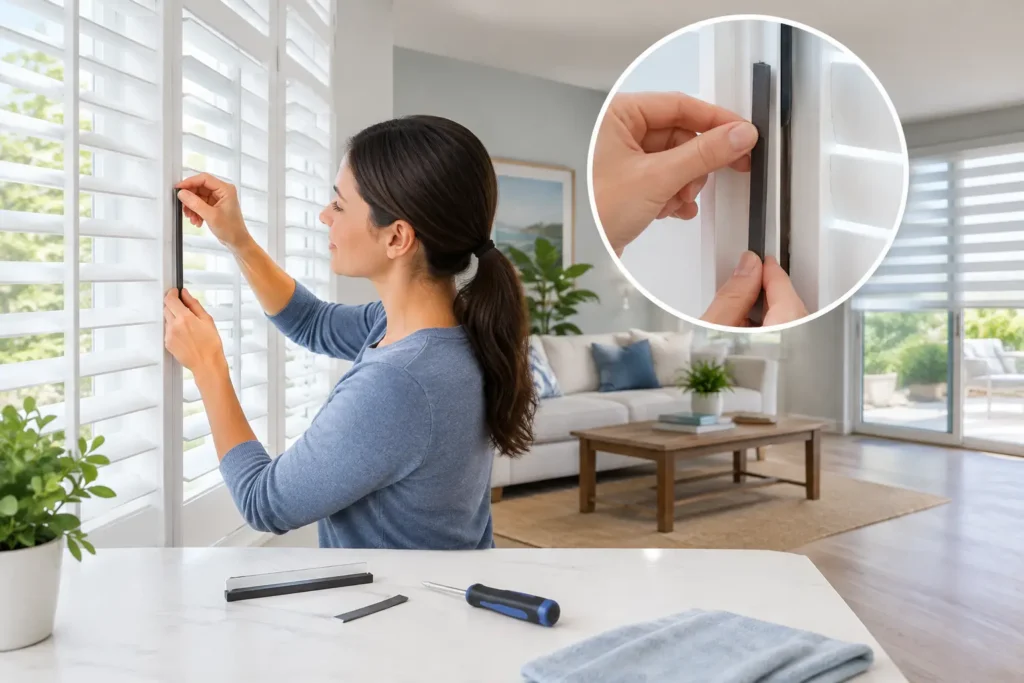
A shutter panel that will not stay closed is usually a small hardware problem, not a reason to replace the whole shutter. In many cases, learning how to replace shutter magnets means swapping one worn magnetic catch or strike plate and making a few careful adjustments. The work is straightforward when you have the right replacement part. The hard part is avoiding stripped screw holes, mismatched hardware, or a panel that closes too tightly.
Plantation shutter magnets are small, but they do an important job. They hold the panel in place so it sits neatly in the frame, keeps its clean lines, and does not swing open when a door closes or air moves through the house. When one fails, homeowners often notice a panel drifting open, rattling, or needing a firm push to latch.
Start by Finding What Actually Failed
Before removing any screws, close the panel and look closely at both sides of the catch. Most shutter systems use two pieces: a magnetic catch mounted to the frame or mounting strip, and a metal strike plate mounted to the shutter panel. Depending on the shutter style, the magnet may be a small rectangular surface catch, a round recessed magnet, or part of a larger closure assembly.
The magnet itself is not always the issue. A loose screw can pull the catch out of alignment. The strike plate may be bent, missing, or shifted. Paint buildup, dust, or a small wood chip can also prevent the two pieces from meeting squarely.
Test the panel gently. If it stays shut when you lift it slightly, the panel may have sagged on its hinges rather than having a bad magnet. Tightening hinge screws or correcting a loose hinge may solve the problem without replacing any hardware. If the magnets meet cleanly but have little holding power, replacement is the right next step.
Get a Matching Replacement Magnet
The best replacement is one that matches the original catch as closely as possible. Measure the old part before ordering or shopping for hardware. Note its length, width, thickness, screw-hole spacing, and whether it is surface-mounted or recessed into the frame. Take a clear photo of the magnet and strike plate too.
This matters because shutter magnets are not all interchangeable. A catch that is too thick can leave a visible gap between the shutter panel and frame. One with screw holes in a different position may force you to drill into a weak area or create extra holes that show. A stronger magnet is not automatically better, either. If the pull is too strong, children and older family members may have to tug the panel to open it, and repeated force can loosen the mounting screws over time.
If you have wood shutters, use care when choosing screw length. Screws that are too long can poke through a narrow stile or frame piece. For composite or vinyl shutters, use hardware made for that material when possible. The material is less forgiving than solid wood if a screw hole gets stripped.
Tools You Will Usually Need
For most surface-mounted shutter magnets, you only need a screwdriver that fits the existing screws, a replacement catch and strike plate, a pencil, and a small level or straightedge. A drill with a small pilot bit can help if the new hardware has different screw locations. Keep a few toothpicks and wood glue nearby if you are working on wood shutters with loose holes.
Use a hand screwdriver for removal and final tightening whenever you can. A power drill can save time, but it can also over-tighten a small screw in a hurry. That is one of the most common reasons a simple repair turns into a larger one.
Remove the Old Catch Carefully
Open the shutter panel fully so you can work without putting pressure on the hinges. Remove the screws from the magnetic catch first, then remove the strike plate if it also needs replacement. Put the old screws aside until you compare them with the new ones. The original screws may fit better than the screws included with a generic replacement kit.
Once the catch is off, inspect the mounting area. Wipe away dust and check for cracked paint, splintered wood, or enlarged holes. If the screw holes are solid, you can install the new part directly. If a screw spins without tightening in a wood frame, fill the hole with a small amount of wood glue and one or two toothpicks. Let it set, trim the toothpicks flush, then make a small pilot hole for the screw.
Do not use this toothpick repair in hollow composite material. In that case, the right fix depends on the shutter construction and may require a different fastener, a backing repair, or moving the catch slightly. Forcing a screw into damaged composite can make the opening larger.
How to Replace Shutter Magnets and Line Them Up
Install the magnetic catch loosely at first. Thread the screws in just enough to hold it in place, but do not fully tighten them. Close the shutter panel slowly and watch where the strike plate lands. The plate should meet the center of the magnet, not just the edge.
If you are replacing both pieces, mount the magnet first, then use a pencil to mark the ideal strike plate position while the panel is held closed. Install the strike plate with one screw, test the closure, and make small adjustments before adding or fully tightening the second screw.
The goal is a panel that closes with a light, positive pull. It should not bounce back open, but it should not need a hard shove either. Check the alignment at eye level. A shutter can latch while still sitting slightly crooked, which usually means the catch is pulling the panel sideways rather than straight in.
After you are happy with the position, tighten the screws by hand until snug. Stop when the hardware is secure. Over-tightening can strip the hole, crack a plastic catch, or pull the frame material inward.
Check the Panel Before Calling the Repair Finished
Open and close the panel several times. Make sure it latches from the normal direction of use, not only when you guide it carefully with your hand. Then check that the louvers still tilt freely and that the panel does not rub against the frame.
If the shutter has more than one panel, compare the repaired panel with the others. The gaps should look consistent. A magnet can hide a hinge or alignment problem for a while, but it will keep working loose if the panel is carrying too much weight or rubbing the frame.
It is also worth looking at the other catches around the room. Hardware tends to wear at a similar pace, especially on shutters in busy spaces such as kitchens, patios, and children’s rooms. You may not need to replace every magnet, but catching a loose screw early is much easier than repairing a pulled-out catch later.
When a Small Magnet Repair Needs Professional Help
Replacing a surface-mounted magnet is a reasonable DIY repair for many homeowners. It becomes less simple when the shutter is sagging, the mounting strip is cracked, the magnet is recessed into a routed opening, or the panel has warped. Those issues affect alignment, and replacing the magnet alone may not hold for long.
Call for help if you cannot identify the original hardware, if the screws will not hold, or if the panel only latches when it is lifted or pushed sideways. A shutter repair technician can match the part, correct hinge tension, repair damaged mounting areas, and make sure the panel closes properly without stressing the rest of the shutter.
For homeowners in the Sacramento area and across California, Shutters Up 360 can help with shutter repairs, replacement parts, loose louvers, hinges, panels, and magnets. Book a free in-home quote at shuttersup360.com or call or text (916) 595-1657. A small catch should make your shutters feel finished and reliable, not become a daily annoyance every time you close the panel.